The Web Management Console provides a simple and intuitive interface for the Management and Control of the Broker. From here, all aspects of the Broker can be controlled, including:
add, remove and monitor queues
inspect, move, copy or delete messages
add, remove and monitor virtualhosts
configure and control high availability
The remainder of the section provides an introduction to the web management console and its use.
The Web Management Console is provided by the HTTP Management Plugin. Providing the HTTP Management Plugin is in its default configuration, the Web Management Console can be accessed by pointing a browser at the following URL:
http://myhost.mydomain.com:8080
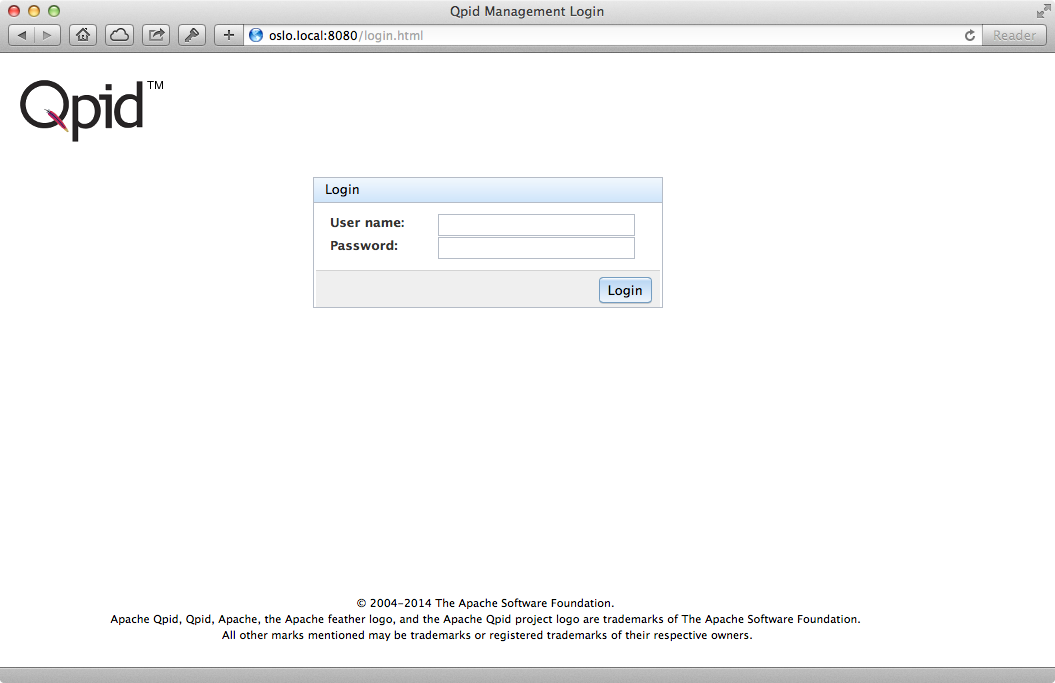
The Console will prompt you to login using a username and password.
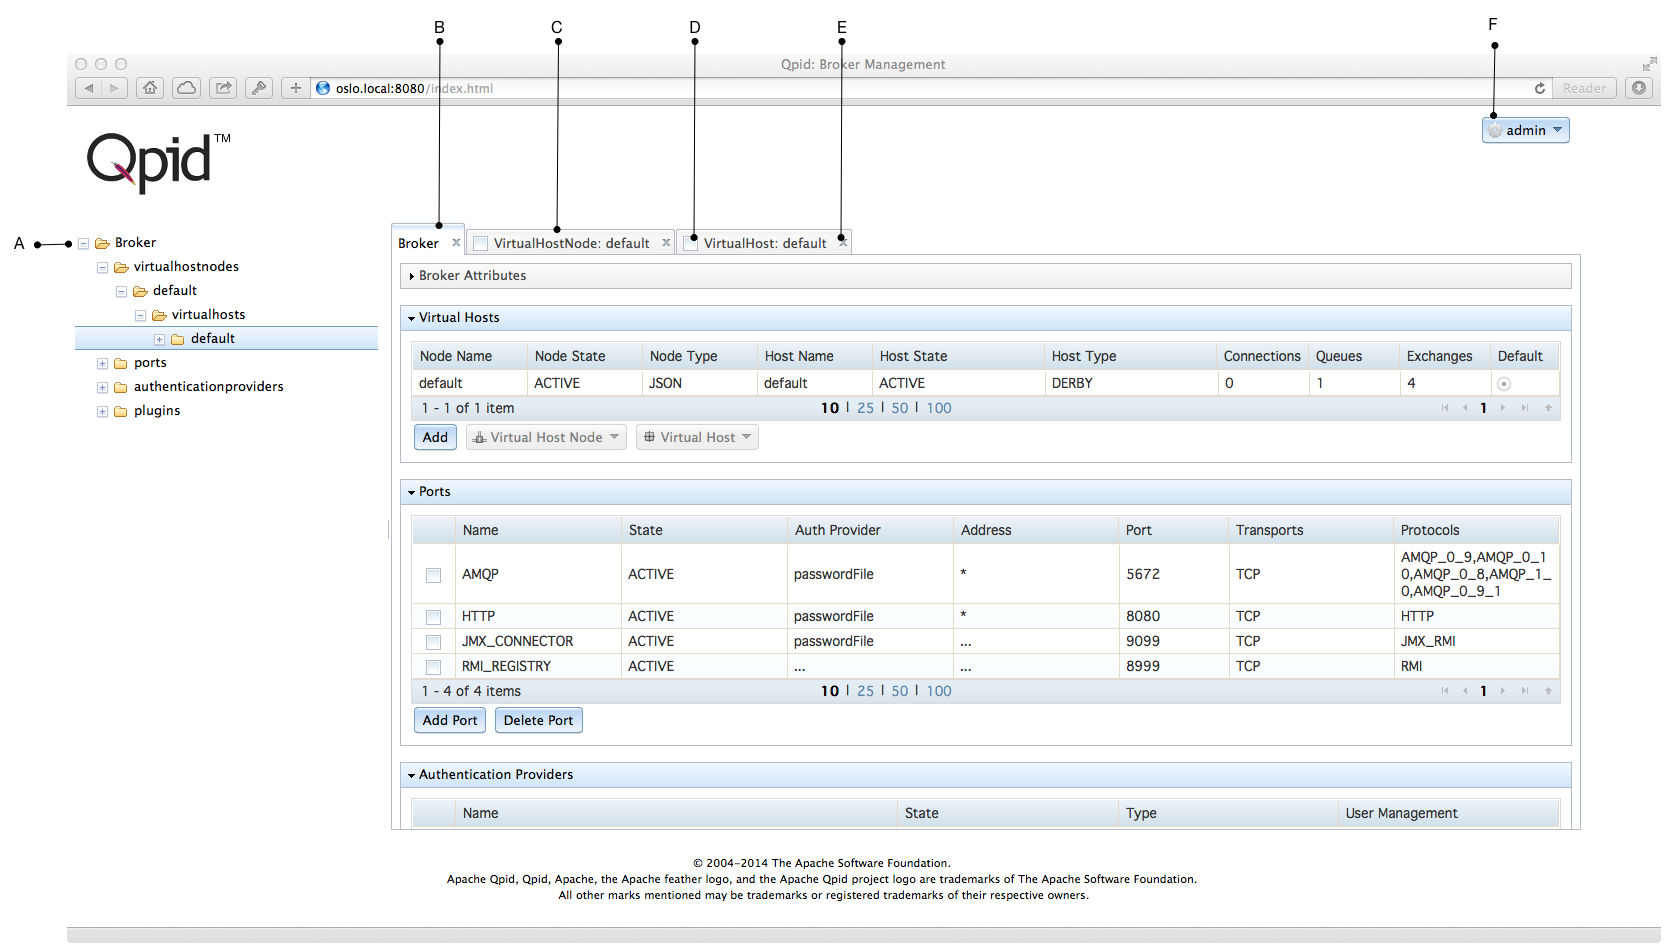
After you have logged on you will see a screen similar to the following. The elements of the screen are now explained.
A - Hierarchy view. Expandable/collapsible view showing all entities within the Broker. Double click on an entity name to cause its tab to be opened.
B - Tab. Shows the details of an entity including its attributes and its child entities.
C - Occluded tab. Click tab name to bring the tab to the front.
D - Auto restore check box. Checked tabs will be automatically restored on subsequent login.
E - Close. Click to close the tab.
F - User Menu. Access to Preferences, Logout and Help.
The elements of a tab are now explained:
1 - Attribute Panel. Shows the attributes of the entity. Click the panel title bar opens/closes the panel.
2 - Child Panels. Panels containing a table listing the children of the entity. Click the panel title bar opens/closes the panel.
3 - Child Row. Row summarizing a child entity. Double click to open the child tab.
4 - Child Operations. Buttons to add a new child or perform operations on existing children.
All the Entities of the Broker of can be managed through the Web Console.
To add a new entity, click the Add button
on the Child Panel on the Parent's tab. Clicking the Add button causes an add
dialogue to be displayed.
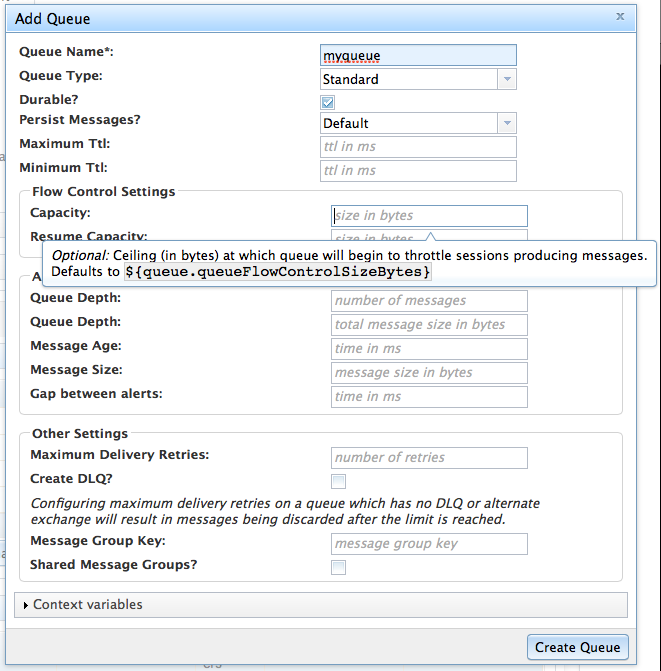
Add dialogues allow you to set the attributes of the new child, and set context variables. Most fields on the add dialogue have field level help that give more details about the attribute and any default value (which may be expressed in terms of a context variable) that will take effect if you leave the attribute unset. An example add dialogue is shown in the figure that follows.
To edit an existing entity, click the Edit
button on the tab corresponding to the Entity itself. Editing an entity lets you
change some of its attributes and modify its context variables. Most fields on the
edit dialogue have field level help that give more details about the attribute and
any default value. An example edit dialogue is shown in the figure that
follows.
To remove an existing entity, click the
Delete button on the tab corresponding to the Entity itself.
For some child types, you can select many children from the parent's type and delete
many children at once.
All Entities within the Broker have the ability to have context variables associated with them.
Most add and edit dialogues have the ability to make context variable assignments. To add/change/remove a context variable, click the Context Variable panel to expand it.
You will see any context variables already associated with the object, called local context variables in bold, and any inherited from above in normal face.
Since context variables can be defined in terms of other context variables, the display has two value columns: actual and effective. Actual shows the value truely associated with the variable, where as effective shows the resulting value, after variable expansion has taken place.
The + button allows new variables to be added. The
- button removes existing ones.
You change an existing local variables defintion by clicking on the actual value. You can also provide a local definition for an inherited value by clicking on the actual value and typing its new value.
Apache Qpid, Messaging built on AMQP; Copyright © 2015 The Apache Software Foundation; Licensed under the Apache License, Version 2.0; Apache Qpid, Qpid, Qpid Proton, Proton, Apache, the Apache feather logo, and the Apache Qpid project logo are trademarks of The Apache Software Foundation; All other marks mentioned may be trademarks or registered trademarks of their respective owners


